
Gifts
Create a Personalised Foiled Card
Aug
Today you will learn which tools you need to make a personalised foiled greeting card at home or in your small office.
Without a massive budget and by using tools that you probably already have!
Sure, you can get a personalised greeting card from any number of online suppliers.
But for a truly personalised card that has a gold foil effect with everything according to your needs, creating one yourself is not as difficult OR as expensive as you may think.
If it’s to include your bespoke card with a birthday, anniversary (or any other special occasion) gift / flower mixed bouquet OR if you want to start a small home business selling bespoke cards then read on.
Learn which tools you need to create your own cool looking foiled greeting cards!
Before we jump into everything you need, the step-by-step process (and for those of you looking to sell cards) where to sell them.
Table of contents
But first let’s try and understand what a foiled card is and the history behind them.
What is a Foiled Card?
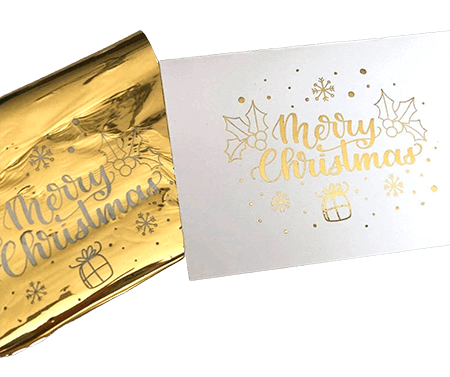
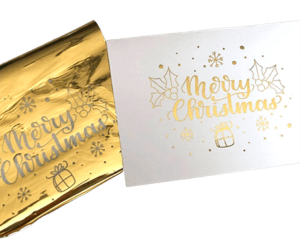
You or your friends/family may have received a beautiful shiny coloured card that looks like it’s using actual bits of gold! Well, nowadays it’s not real gold foil but a thin film of aluminium or tin which when combined with a colour layer produces the desired colour effect you can use on card or paper.
It was an age-old process of applying gold-coloured foil onto card/paper and other materials to create a luxurious-looking and gleaming card design.
The foil is bound onto the cardstock/paper using heat and pressure techniques. Foil can be applied to whole sections of a card design or only to certain areas to extenuate a particular design feature. You can highlight text, shapes or anything else your imagination has in mind using foil.
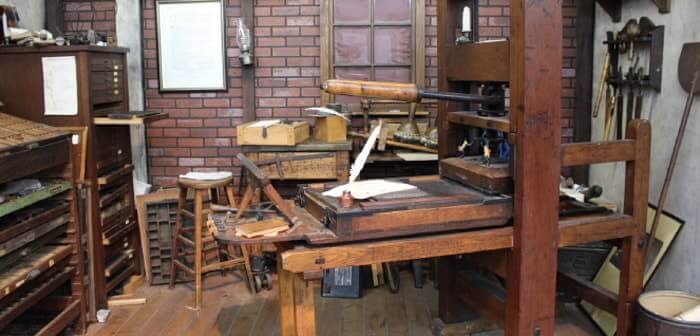
A Quick History of Foiling
In the present day, you can see many foiled products in high-end stationery and related products. Foiling has been around for centuries in traditional printing practices.
In the past foil printing, was also commonly known as foil stamping. Foil pressing was the term given to a process of transferring specialised foil onto card/paper materials to create an embellished effect.
The most common use in the past of foil pressing was on book covers.
Beginning with the handset gold leaf decorating often using custom-built engraved metal plates. Depending on the technique used, it would be a time-consuming and labour-intensive process.
In the old days, real gold leaf was used on these manuscripts and leather book covers. The earliest known time this process was used was in the 12th century on gold leaf decorated bible covers originating from Morocco.
As the mass production and printing of books became more widespread, with the introduction in the 15th century of the Guttenberg press, so did the demand for foiled prints.
By the late 1950s, real gold leaf was substituted with imitation gold foil which was much cheaper and more durable to use in foil printing.
As the mass production and printing of books became more widespread, with the introduction in the 15th century of the Guttenberg press, so did the demand for foiled prints. By the late 1950s, real gold leaf was substituted with imitation gold foil which was much cheaper and more durable to use in foil printing.
Even so, foil printing was still not available for the general public to do themselves.
If you were looking for a foiled item it would typically come from commercial printers who would use a straight stamp press or rolling press. This entails the use of a die and foil which were inserted between the paper and die and then pressed together to give the effect. This is known as commercial hot foil pressing.
This kind of commercial foiling is only suitable when running batches of foiled items in 1 colour and design and then resetting the press for a different design/colour that’s required. It’s not for small bespoke items as it wouldn’t make commercial sense to do.
🌍 With the dawn of the internet and modern computers, it’s now become much easier for the layperson to digitally print a design and then apply foil on top of the paper right in the comfort of your own home!
Many small businesses that you find on the popular Etsy marketplace provide bespoke foiled items that they make right at home or in their small home office.
The biggest advantage that small operators have over commercial foil printers is that they can print and foil many items at a time. Unlike commercial foiling, it doesn’t need a die or batch process for each foil run. You take your digital design and print it onto your cardstock/paper and then foil on top!


There are 2 methods of doing this, hot foil printing and cold foil printing. Today we will be delving into hot foil printing rather than cold which we will talk about another day.
The hot foil printing technique we will be using simply requires you to print your design onto your cardstock or paper. Then pass heat over the foil that’s placed on top of the area of the design you want foil applied to.
The foil adheres to the part of the design that you have printed with a type of ink that’s available in mono printers that melts when heat is applied to it. The foil will stick to that melting ink resulting in the foiled effect on top of your design.
You will need the following tools so you can start foiling at home (or in your small home office):
- Computer – plus suitable programs
- Laser Printer (mono)
- Cardstock / Paper
- Toner Foil
- Foil Machine
- Scoring Board
Getting flawless foiled card printing can be quite a task especially if you are new to it. It’s even more frustrating to get right if you intend on foiling many prints at a time.
Hence why we are going to give you the best practices and settings that we have found work time and time again to foil cards/paper without any problems.
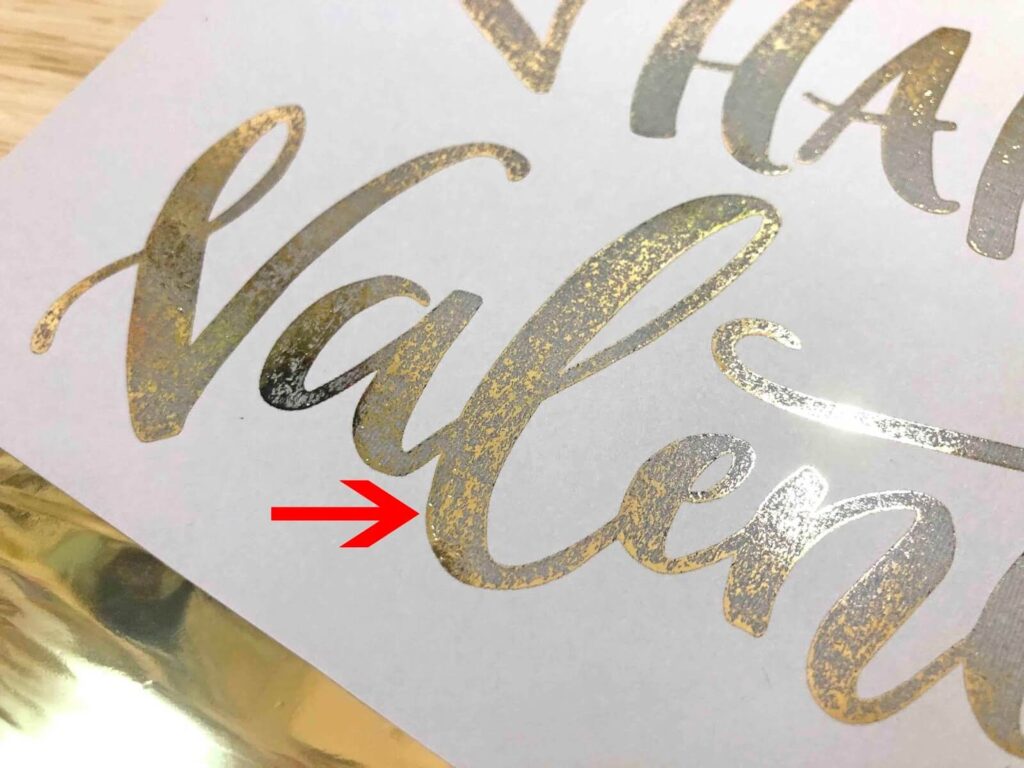
After all, you want a near-perfect foiled card and not one that has black specs on it right?
⚠️ FYI some foiled cards contain black specs or little black dots. This is ink that’s not adhered to the foil when the heat was passed over it. It’s a pretty common issue when foiling at home and our ‘tips’ will help you overcome this issue.
1. A Computer & Programs
You will need a PC to be able to design the image that you want to use for your foiled print. Any desktop PC or laptop will do the job. What you need is a good graphics program.
The better the quality of the digital image the better it will print and thus the better the foiled print. Ideally using Photoshop or Illustrator (for more complex images) is preferred.
💡 For beginners out there, you can use any type of program. Free programs like Gimp and Irfanview should be adequate for the job if you don’t have access to Photoshop.
In either case, what you want to make sure of is that the image you will be printing is of high quality. The higher the resolution (DPI) the better the print will be and resulting foiling.
Vector-based images will perform the best as they won’t lose any resolution when making them smaller or bigger.
The design can contain any number of different elements and colours. What you need for the foiling part is to ensure the area that needs to be foiled is in TRUE BLACK.
Your colour monitor uses what’s called RGB (red, green, blue) to display colours. Whilst that’s good for a screen it’s not good for printing. In printing CMYK (cyan, magenta, yellow, and black. ‘K’ is used for black to avoid confusion with the colour blue) is what’s used.
Why? well RGB has certain limitations. Colour monitors emit light which RGB is great for but printers will reflect light so you need a wider colour range.
❕ As an example. What looks like red on a monitor in RGB colour will print out to pink if you use the same RGB colour! You can find much more in-depth information on the differences between RGB and CMYK on the net.
If you haven’t already, first convert your image document into CMYK. In Photoshop you can do this by going to: Menu > Image > Mode > CMYK
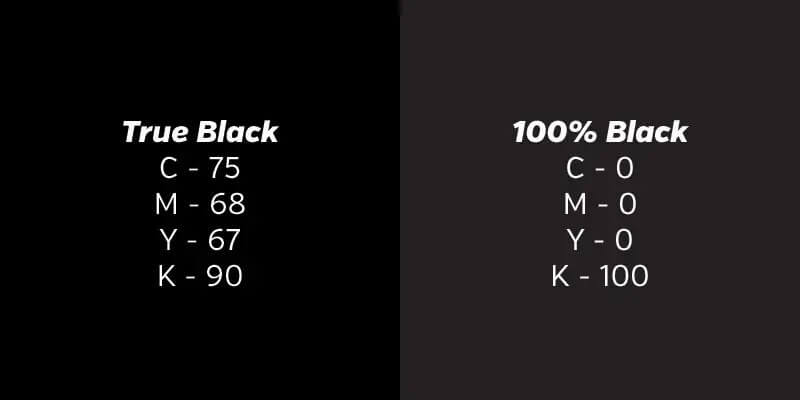
To get a true black in CMYK you don’t set the colours to C:0, M:0, Y:0 and K:100 This gives you a shade of grey and not true black which is what we are after.
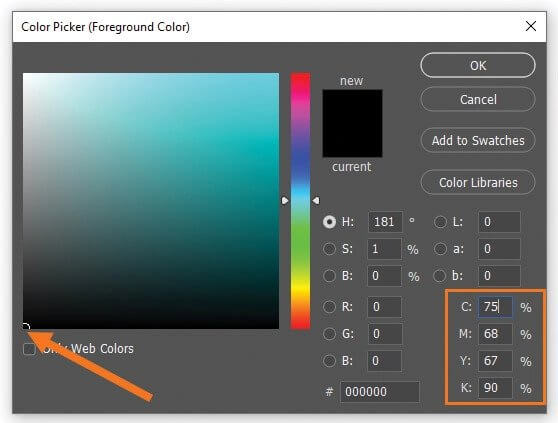
Instead, you need to use these values: C:75, M:68, Y:76, and K:90 as that will print out in true black and be perfect for your foiling. You can do this by simply dragging the colour picker all the way to the bottom left corner.
When you have finished your design and defined the black area where you will be foiling, we have found that it’s best to export the image as a PDF doc. AdobePDF is the most popular program for this.
All graphics programs will export to a PDF format. Rather than printing directly from the graphics program, we will be printing the PDF instead. In our tests, it’s been much more consistent in print output.
2. Mono Laser Printer
Everyone will have (well nearly everyone) a printer at home. But there are 2 types: 1 which will print in colour and black and another type which will only print in black.
Having the right printer is super important. The one you need is a mono laser printer. This only prints in black.
There are quite a few on the market but the one we have found to be robust and a rock-solid performer for foiling is the Samsung M3820ND A4 Mono Laser Printer. A very good printer for foiling.
It can handle card stock and paper up to 300GSM and will easily print out roughly 2.5k pages before the toner cartridge needs to be replaced. It’s got a rear entry tray for you to be able to print your design. This is handy as you don’t want the design to curve which will happen if you use the top tray.
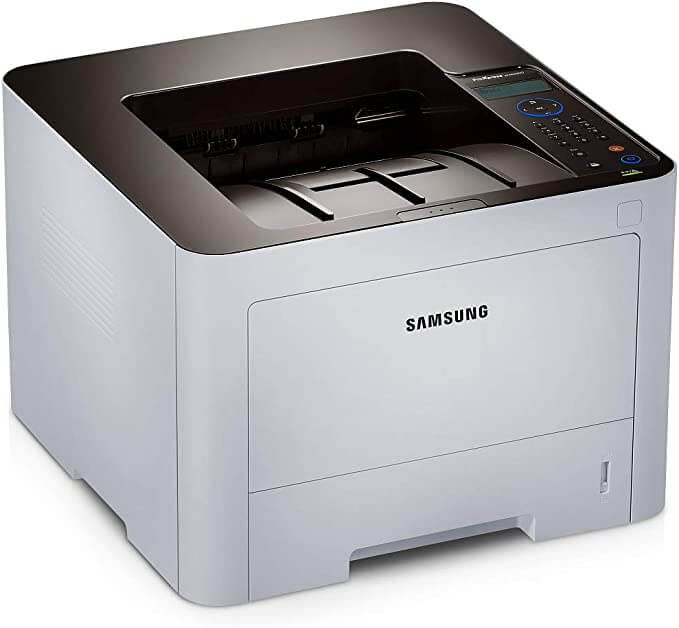
For those using this printer for a home project, it’s perfect. It’s not expensive at all costing around £140 and can often be found cheaper on Amazon. Not only can it be used for your foiling requirements but also in any general printing that you may need to do.
As a printer for a small business looking to start foiling prints to sell, it’s a great machine. Solid, durable and well-rounded to get you a good ROI on your investment. You will be able to print out 2k pages (for foiling or otherwise) before a replacement cartridge is needed. These Samsung printers also have a good track record and can often run for years without issues.
The pros of this printer are:
- Great for foiling
- Cheap from only £140
- 1200 X 1200 DPI output
- Prints to card, paper and labels
There are only a few negatives that we have so far found with this printer:
- New printers only come with 25% full ink cartridge
- Max paper size is A4
- Difficult to get hold of – very in demand
It is one of the best printers you can use for foiling projects if you can get hold of one!
When printing you need to ensure that your printer settings are correct for the best output possible for foiling. Use the following settings to ensure your print comes out good for foiling but to also ensure that you are not overusing your ink either.
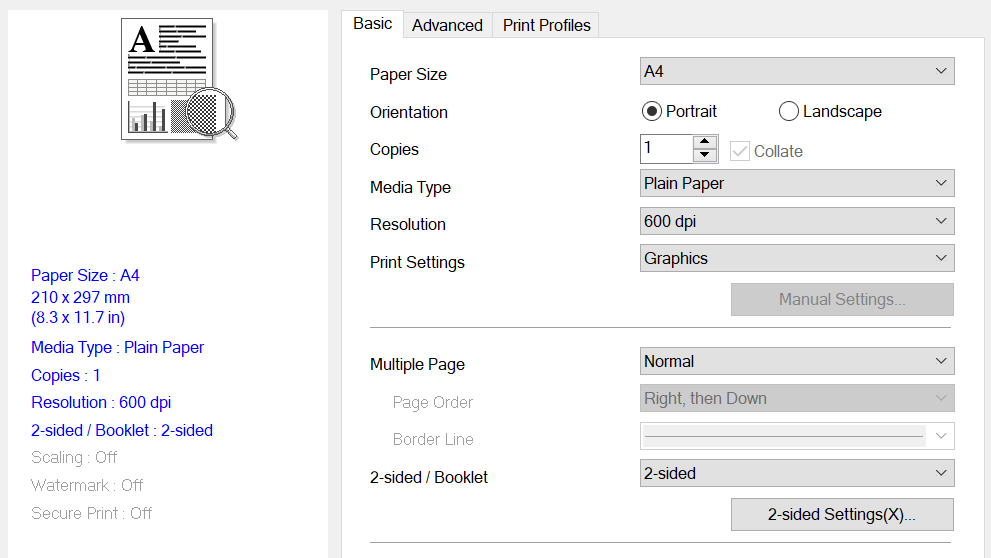
From your AdobePDF print screen click on properties next to the printer’s name. From there make sure the following settings are selected in the basic section:
- Media type: Thicker Paper
- Resolution: 1200 DPI
⚠️ make sure save toner ink is NOT selected
Then click on the advanced tab and the other Print Options(Y) button. From here the best settings we have found are:
- Density Adjustment: HIGHEST setting
- Improve Print Output: Select Improve Toner Fixing option
Those basic settings will help to print out a good design ready to foil whilst still conserving ink.
3. Cardstock / Paper for Foiling
When it comes to the type of cardstock/paper you get can have an impact on the quality of the foiling. But if you apply the right settings for the design and printer you will find that you can use a wide variety of cardstock and paper for your foiling.
We have experimented with lots of different cards/paper, weights and colours. The most consistent results we have seen have been with card/paperweights of 230GSM which the Samsung printer easily accepts. This cardstock is also good for foiling with a wide variety of foil types and for the foil machine itself.
A white card is what’s generally used for greeting cards and the colour which we often use. After experimenting with quite a few different types of card/paper we found a happy medium in A4 Mondi colour copy 230 GSM paper. It is readily available from Amazon or your local craft shop at a cost of around £14 per 250 sheets.
Another good paper is from the UK company PermaJet. There A4 Matt Plus paper is a very good alternative to use for foil printing. The results we have been able to get using this paper have been the same as using Mondi if not better.
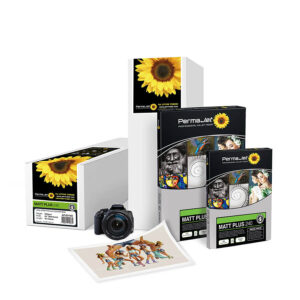
The added benefit of using this paper is that PermaJet also provides ICC profiles to use in your design program. These are specifically made for their paper!
🔗 Advanced users can get ICC profiles here: https://www.permajet.com/icc-profiles/
4. Toner Foil
Toner foil is what we will be using to create the shiny foiled look. There are lots of different types of foil available. The one you will need for your foiling is reactive toner foil which as you can guess, reacts with heat when used.
Be careful not to buy adhesive foil which looks the same it is different for our purposes.
Gold foil is what’s often chosen and the Deco foil brand is a very popular foil to use. Readily and easily available from Amazon and many craft shops. It does have pros and cons:
- By far the thickest of foils
- Readily available from many sources
- Expensive compared to alternatives
- smaller roll QTY compared to alternatives
There are many alternatives available in the market. After much testing, we found foils from the patsymay.co.uk website to be the best in terms of quality, price and available sizes.
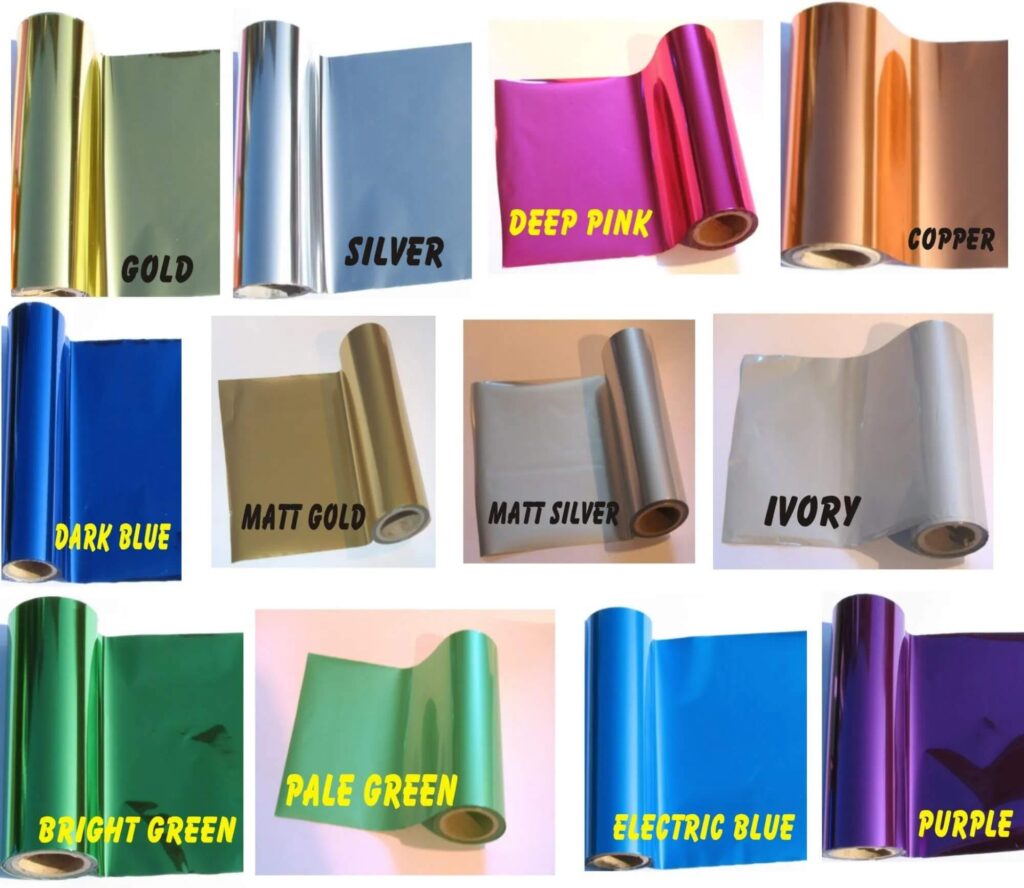
You don’t have to just use the colour gold. There are many different colours available. You are spoilt for choice. The bonus with using patsymay foils is the amount you get.
Compared to Deco foil you get a staggering 15 meters of foil with each patsymay foil roll. This will be more than enough for your foiling needs. Especially if you intend on selling foiled greeting cards.
5. The Right Foil Machine
Your foils may be very poor depending on your choice of a foil machine. Sure, you may get good foil printing by using a traditional laminator which can cost as little as £10. But it definitely won’t provide you with the consistency you need.
⚠️For a one-off project you may be able to get away with using a laminator for 1 foil print, but no more. So, beware of that limitation.
As far as the most popular machine goes, it has to be without a doubt the Heidi Swapp Minc foil machine. A light and portable machine it can foil very easily and is beginner friendly.
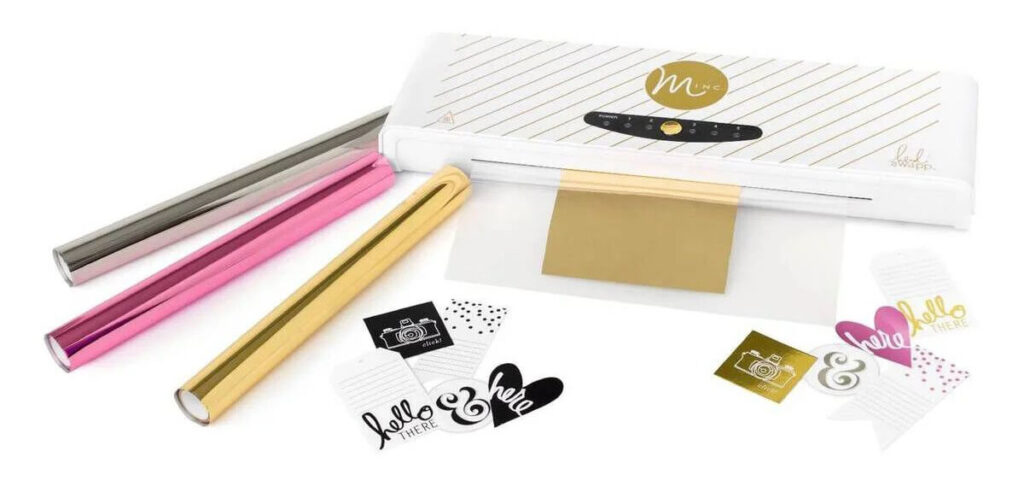
It works great with the paper that we have recommended and even uncoated black cards (sometimes it is a hit-and-miss). There are 5 heat settings that you can use to foil your prints.
In our testing, with 230GSM white card stock, use heat setting #3 to get a flawless foiled print. Add in your printed image with the foil on top and insert it into the provided transfer folder and let it go through the Heidi Swapp Minc machine.
As a guide the Heidi Swapp Minc foil machines settings can be used for the following types of media:
- Setting 1 – Transfer Adhesives, thin vinyl
- Setting 2 – Clear overlays, vellum, lightweight coated paper, shiny sticker paper
- Setting 3 – Non coated papers, coated cardstock
- Setting 4 – Uncoated cardstock
- Setting 5 – Chipboard.
Don’t pull or try to push the folder through. The rollers of the Heidi Swapp Minc foil machine will do this automatically.
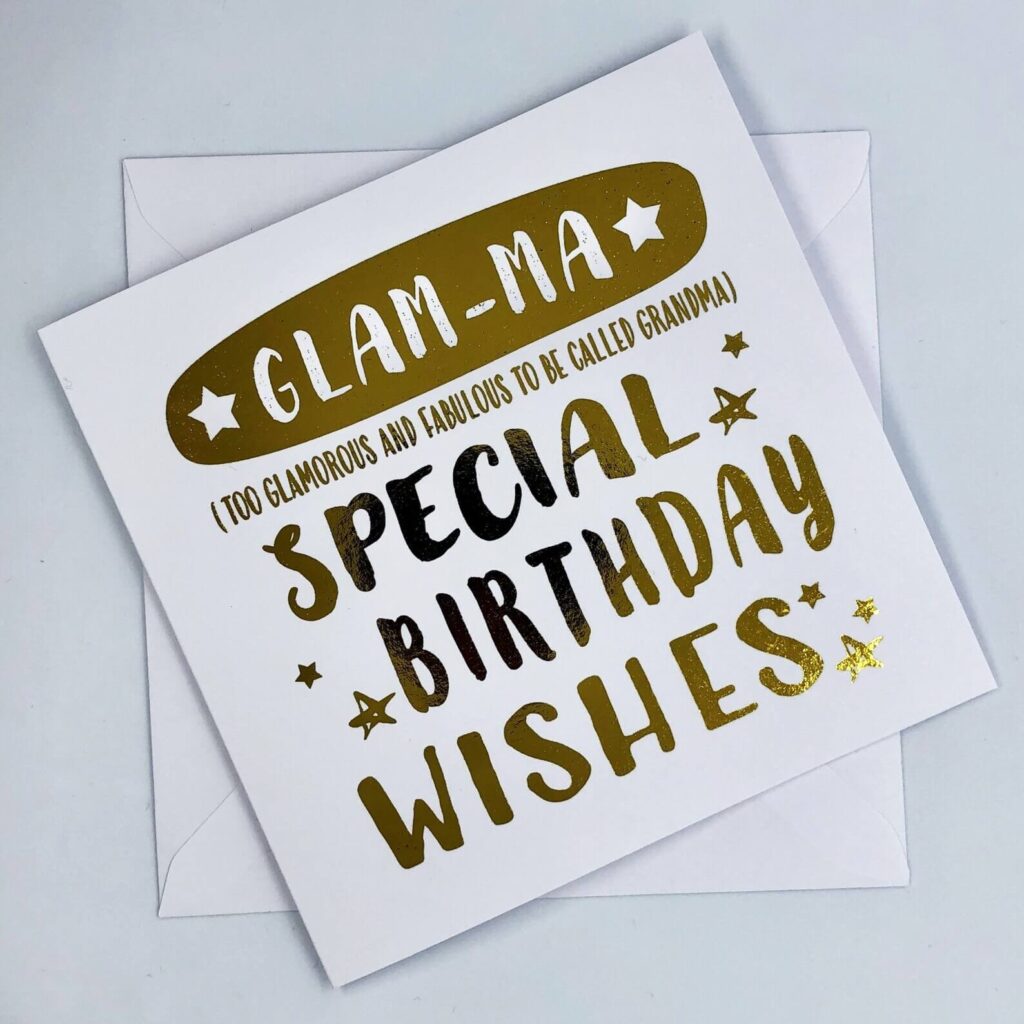
Once the whole sheet has gone through remove the cardstock/paper with the foil on top and let it cool for a few minutes. Once it’s cooled carefully remove the foil. You should be left with something similar too:
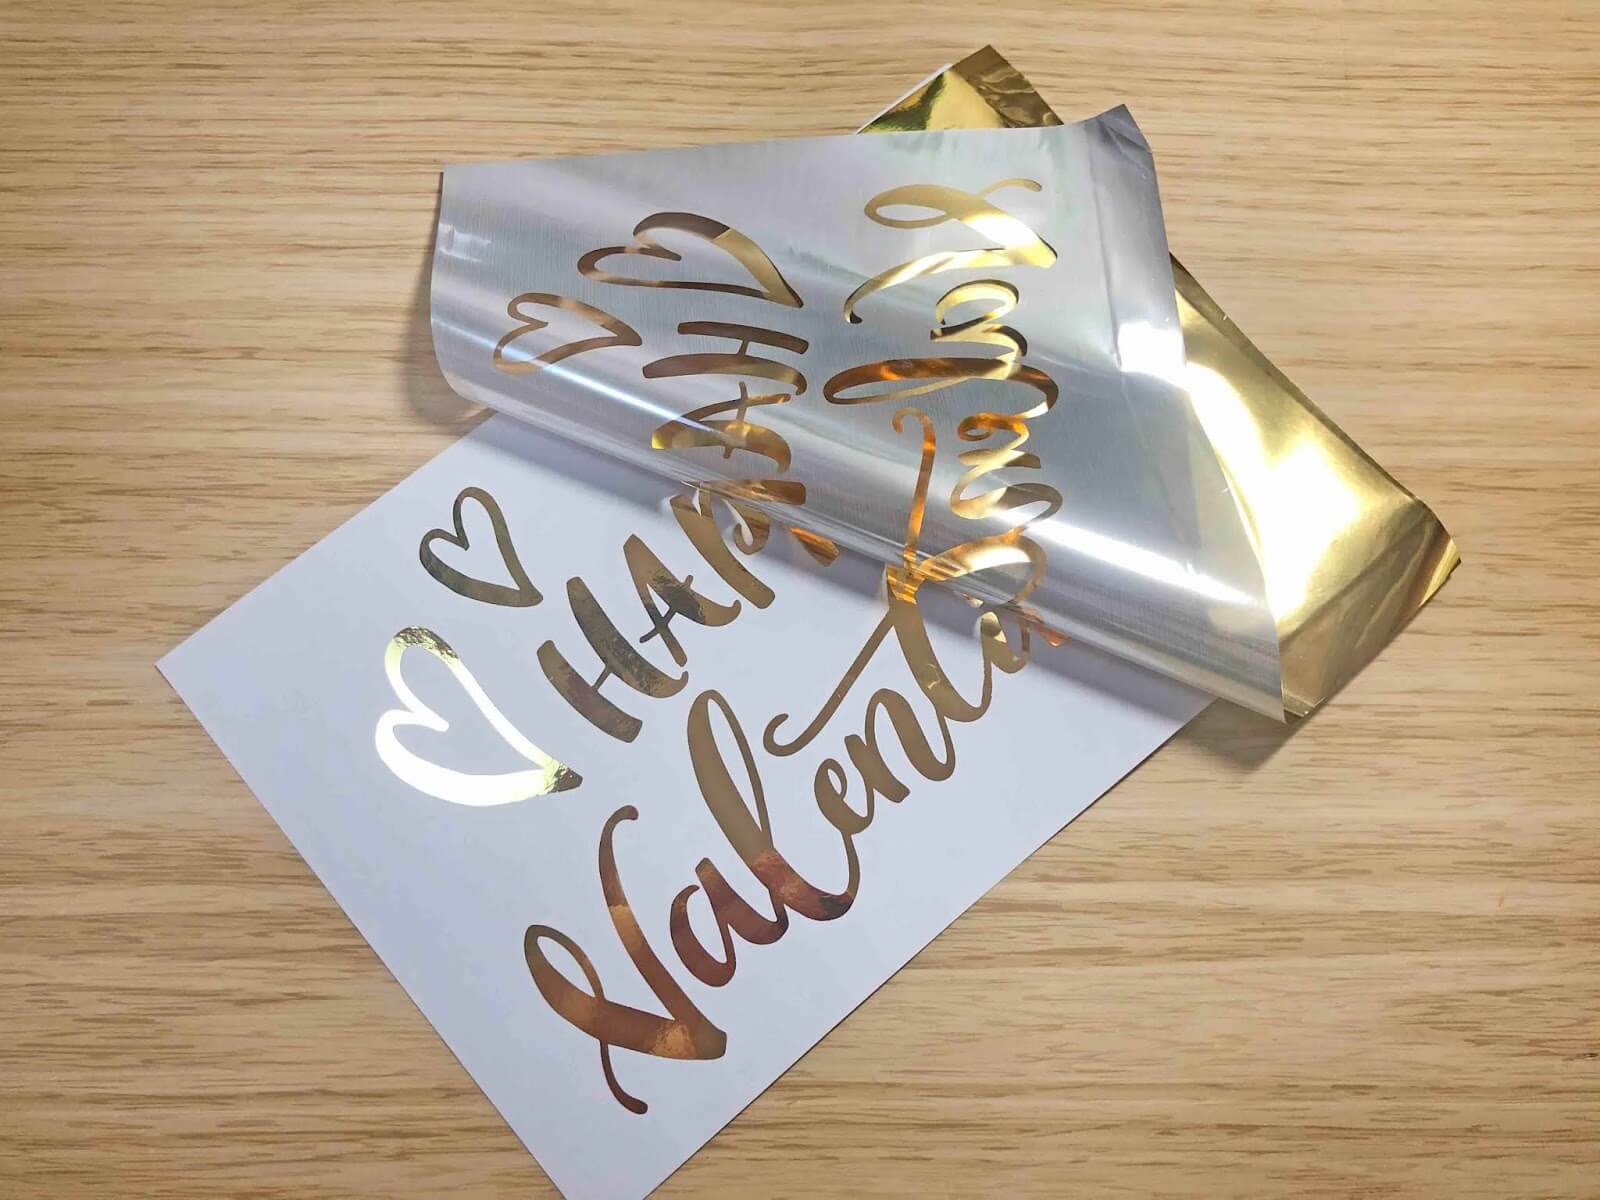
A nice and crisp foiled image with no blemishes or dark spots 😊 If however, your foiled images contain blemishes or dark spots then this could be due to a few reasons like:
- Heat setting too low
- dust or tiny particles
Always do a test before starting on a whole foil project beforehand to ensure all the settings are right and the end result will look good.

There are pros and cons with the Heidi Swapp Minc foil machine:
- Cheap to buy starting from £97
- Works on various media (cardstock, paper, vinyl)
- Includes transfer folder
- Gets hot after prolonged use
- Not suitable for continuous printing
- Hard to find stock
Generally, for 1 off or infrequent use, the Heidi Swapp Minc machine is a great choice. Small enough to sit on your desk, portable so you can take it with you and not heavy either.
But the biggest downside is that it’s not suitable for a small home office setup where you may need to foil a few hundred (maybe a thousand) pieces at a time. Sadly, it will overheat and eventually, the rollers will get stuck.
If that’s what you need it for take a look at the PatsyMay foil machine.
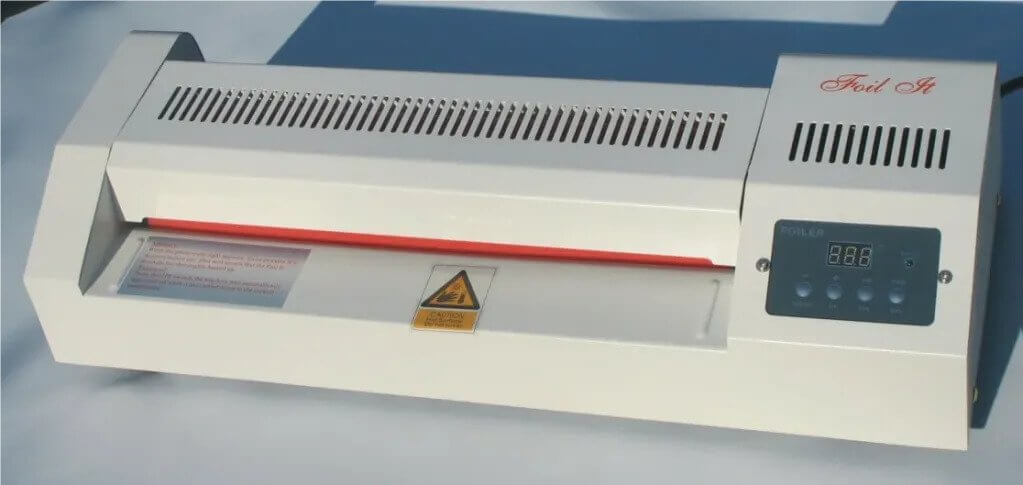
This foil machine is more than adequate for your small commercial foiling requirements. It does have a steep learning curve to get the right settings for a perfect foil. But once you have them it’s very easy to foil a few thousand pieces at any given time.
The machine has a heat setting which allows you to increment 5 degrees at a time. We found for most of our foiling that setting the temperature at 195 degrees was the best. Too low and your foiled print will come out looking like it has blemishes on it.
The patsymay foil machine doesn’t come with a transfer folder (that would simply melt). But you should cover the front and back of your print to be foiled with a very low GSM piece of paper. A very cheap piece of paper from your local supermarket shelf will be more than enough.
There are pros and cons with the PatsyMay foil machine:
- Great for small commercial use
- Foil up to 350GSM
- Foil up to an A3 sheet
- Heavy machine
- Lots of testing required
- Only for cardstock and/or paper
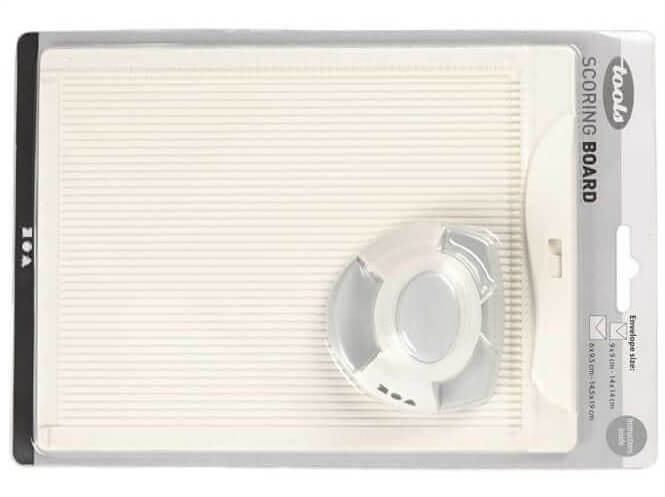
6. Scoring Board
A good scoring board. When making greeting cards you will often need to make a fold in the card. You can do this without a scoring board but often it will get you poor results.
A good scoring board can be found in any good craft shop and cost less than £10. They are a great addition to your foiling tool set. Good scoring boards come with traditional size guides for you to score at the right size and angle.
A small tool that lets you make the score will also help to finish off the fold at the required position. A bonus of using a scoring board is that you can also print off, foil and then make a bespoke envelope for your greeting card!
There you have it. All the tools you will need to make a bespoke greeting card foiled with the foil colour of your choice and to give along with the half a dozen red roses. To recap the steps that you will need to take are as follows:
- Design your image and use the true black colour on the areas you want the foil to appear
- Print your digital design using the right mono laser printer and settings as recommended on good cardstock/paper
- Clean the printed image and foil with a small brush to remove any dust and small particles
- Either place into a transfer folder if using the Heidie Minc machine OR between sheets of paper for the patsymay foil machine
- Choose setting #3 for the Heide machine OR set the temperature to 195 degrees for the patsymay machine and let the print roll through naturally
- Let the resulting foil cool for a few minutes
- Carefully take off the foil
If you have followed all our recommendations and used the right tools you will have printed and foiled a beautifully crisp foiled greeting card of your own making!
BONUS: Selling Foiled greeting Cards
Last but not least. If you are a small home business and are looking to get into arts and crafts then foiling bespoke items is a great way to make an extra income. The quickest and easiest way to get eyeballs and exposure to your custom foiled art and generate new sales is to use the Etsy marketplace.
Print off and foil at least 25 items that you will use for your first lot of listings on Etsy. Each of these can have at least 3-4 sizes (i.e. A4, A5, A6, A7) which will give you at least 100 listings.
The reason for this is Etsy’s internal search prefers listings that have more than 70ish listings. Those that have featured more prominently and higher in their internal search results.
As you will be paying Etsy for those listings (approx. £15) and it’s in Etsy’s best interests to promote your listings as it will also make a commission each time a sale is made.
Typical quality bespoke foiled art including greeting cards on Etsy can cost at least £10. So, there is a good profit margin to be made if you print good quality foil prints.
There you have it. We hope you find this information useful and now it’s over to you. Let us know in the comments below what your experience has been of foiling, good or bad.